Affiliate marketing is a great way to generate income online. Currently, I make about $200/month using affiliates!
To promote external links effectively, you need to make sure that your marketing is working and generating traffic through the affiliate links.
Tracking clicks & views through Google Tag Manager and Google Analytics 4 allows you to know “is your affiliate working” on the click your current marketing strategy and provides you with the data needed to inform future action taken on said strategy.
Let’s go through how to track affiliate and outbound traffic by monitoring link clicks. We will measure traffic and engagement with these links, visualize and display this data clearly and concisely, and provide a logical path to action.
Set Up “Clicks” in Google Tag Manager
The first step in displaying your affiliate links is gathering the data. Google Tag Manager allows you to track all clicks on your website and differentiate between on-site and outbound clicks.
In case you have randomly stumbled upon this article and don’t know what’s going on right now.
No worries! We have you covered! Before you continue reading, check out this incredible video by our very own Stockton Fisher that’ll help you get started.
Back to the main event. Let’s hop right into GTM!
In your GTM container, we are going to create a new tag.

If your screen looks like this, you’re on the right track. Click on “Choose a tag type to begin setup…”
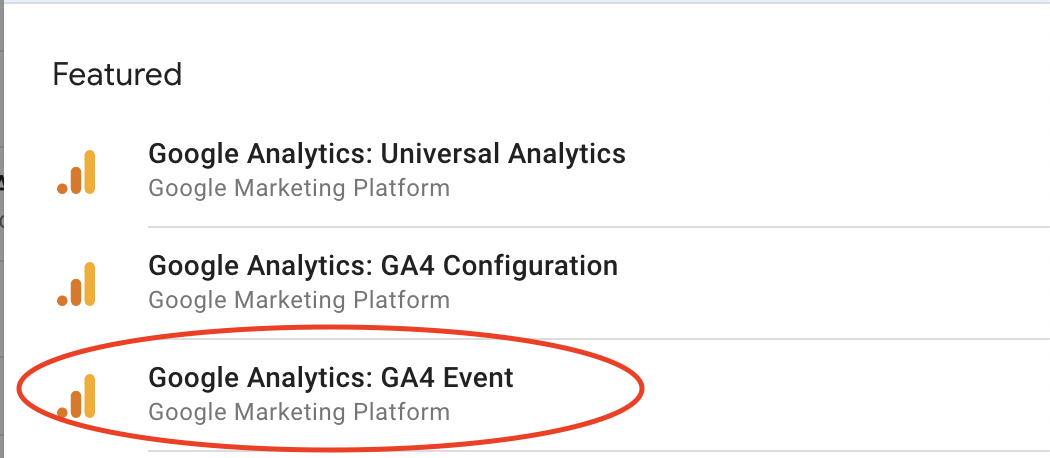
You will be prompted with a list of tag types. Select “Google Analytics: GA4 Event.”
For the basic set-up of this tag, you’ll need to select a configuration tag and name the event.
Select your container’s config tag, and name the event “click”.
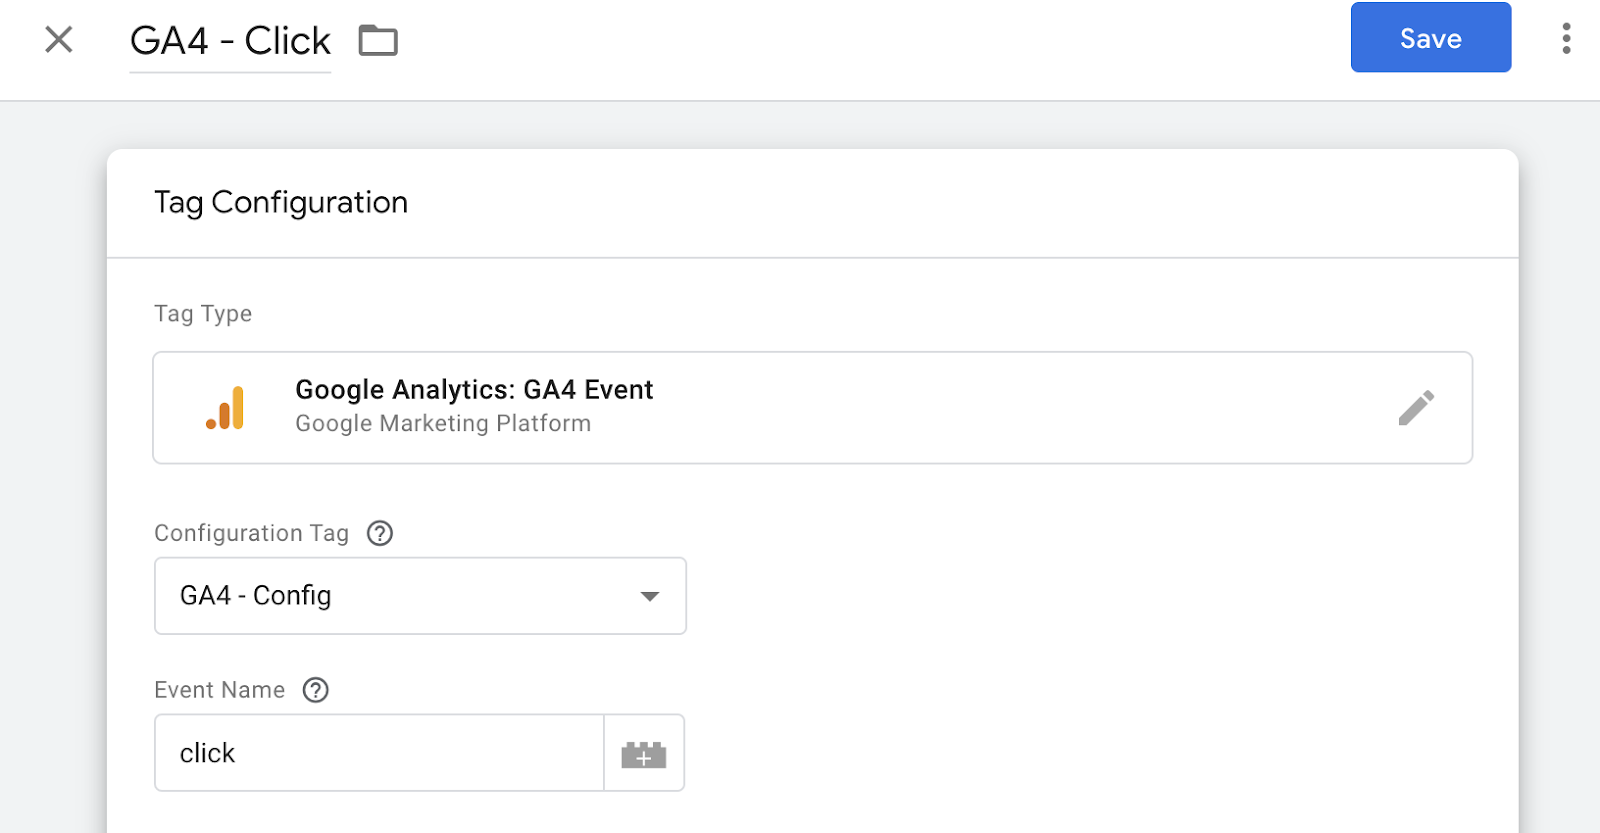
Before we move on to the next step, make sure to click Save.
A prompt will pop up and ask you to add a trigger. We will add one eventually, but for now, just save the tag.
GA4 Click Varriables
Next, we will need to set up several parameters that will allow us to gather and store detailed information about what exactly is being clicked on our page.
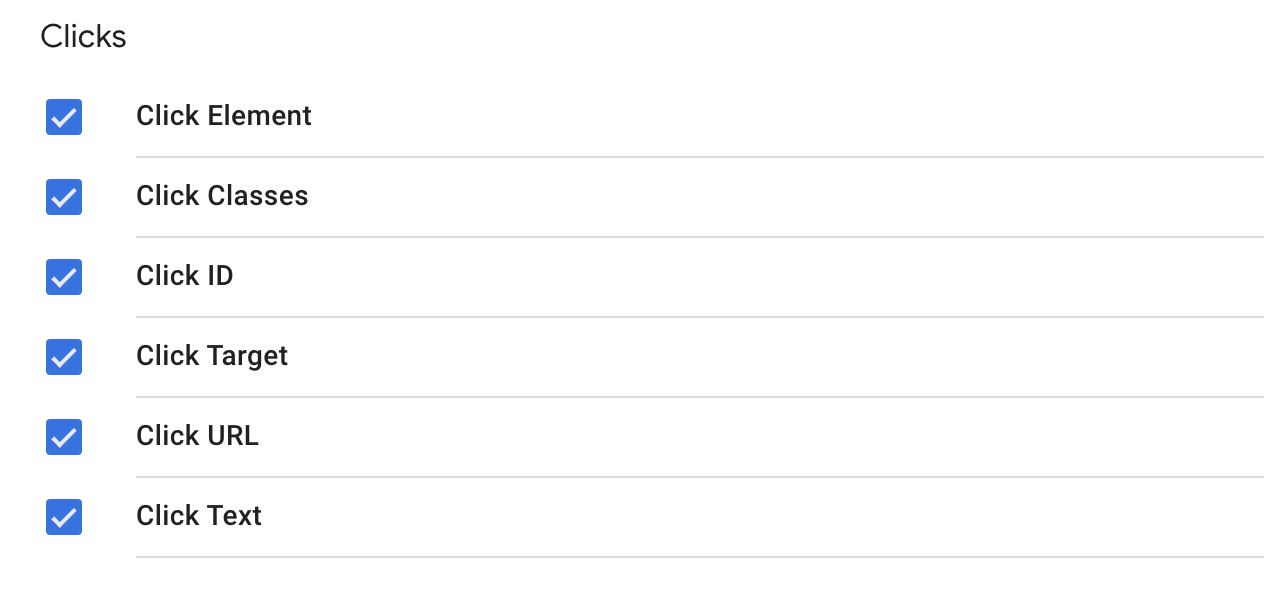
To set up these parameters, we need to create four different variables. Three out of four of these variables are built into the Tag Manager System. They must be manually turned on.
Under the variable tab, click “Configure” for Built-in Variables.
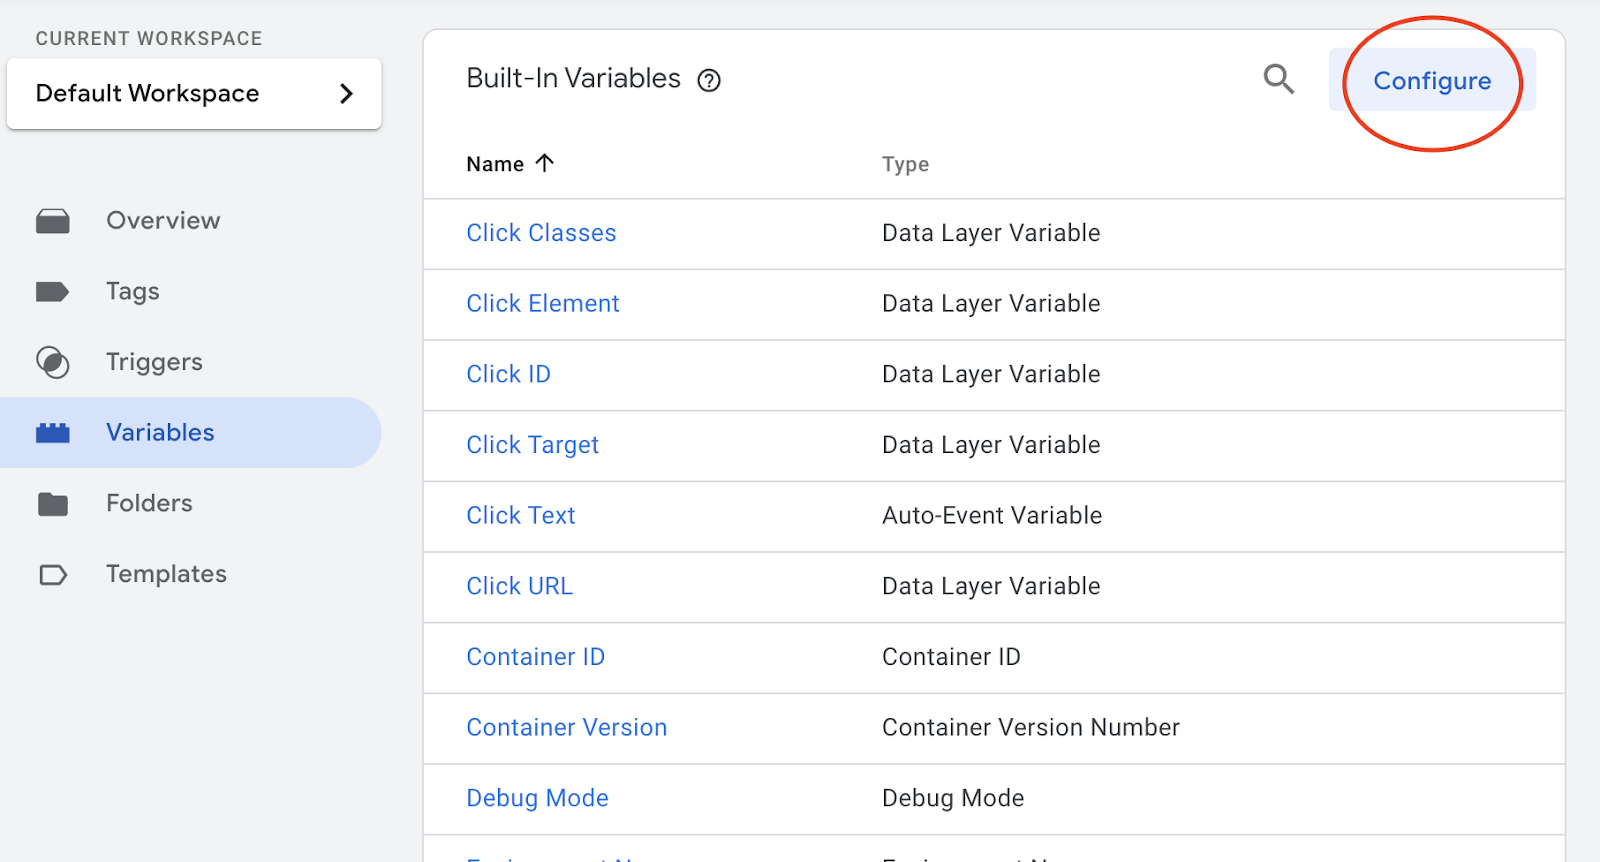
In general, it’s helpful to just turn on all of the built-in variables, but for the purposes of this article, we only need to toggle all the Click variables on.
For the first three variables, this is all that you need to do to complete their set-up. The fourth and final variable is a bit more complicated.
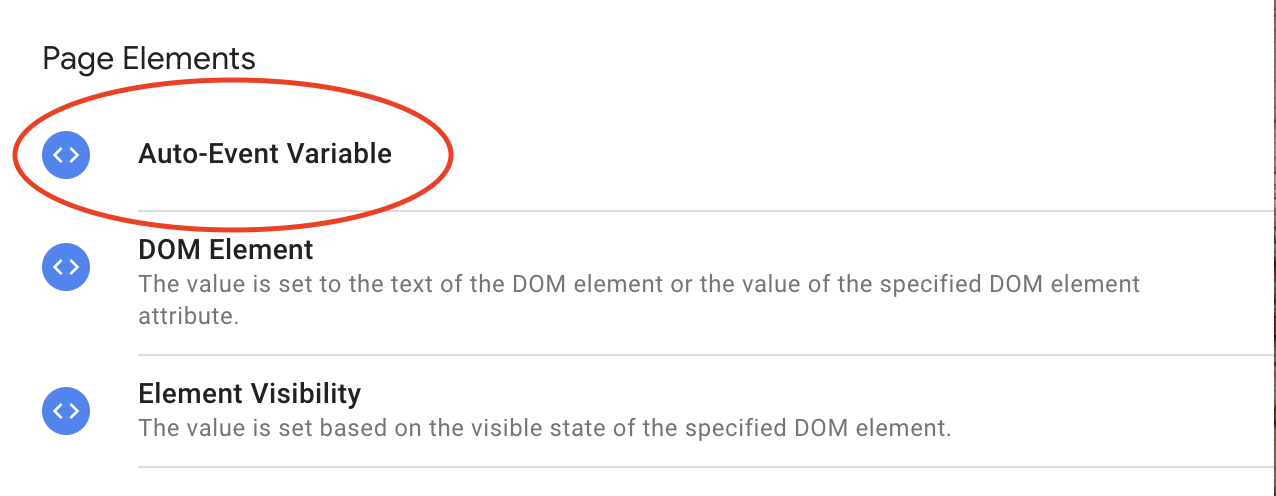
If you scroll further down the variables page, you will see a section titled “User Defined Variables.” At the top right corner, click the button that says “New.” Title your new variable “Click – Outbound” or something similar.
Auto-Event Variable
Next, we need to select our variable type. Open the menu and scroll down to the section titled “Page Elements,” and select “Auto-Event Variable.”
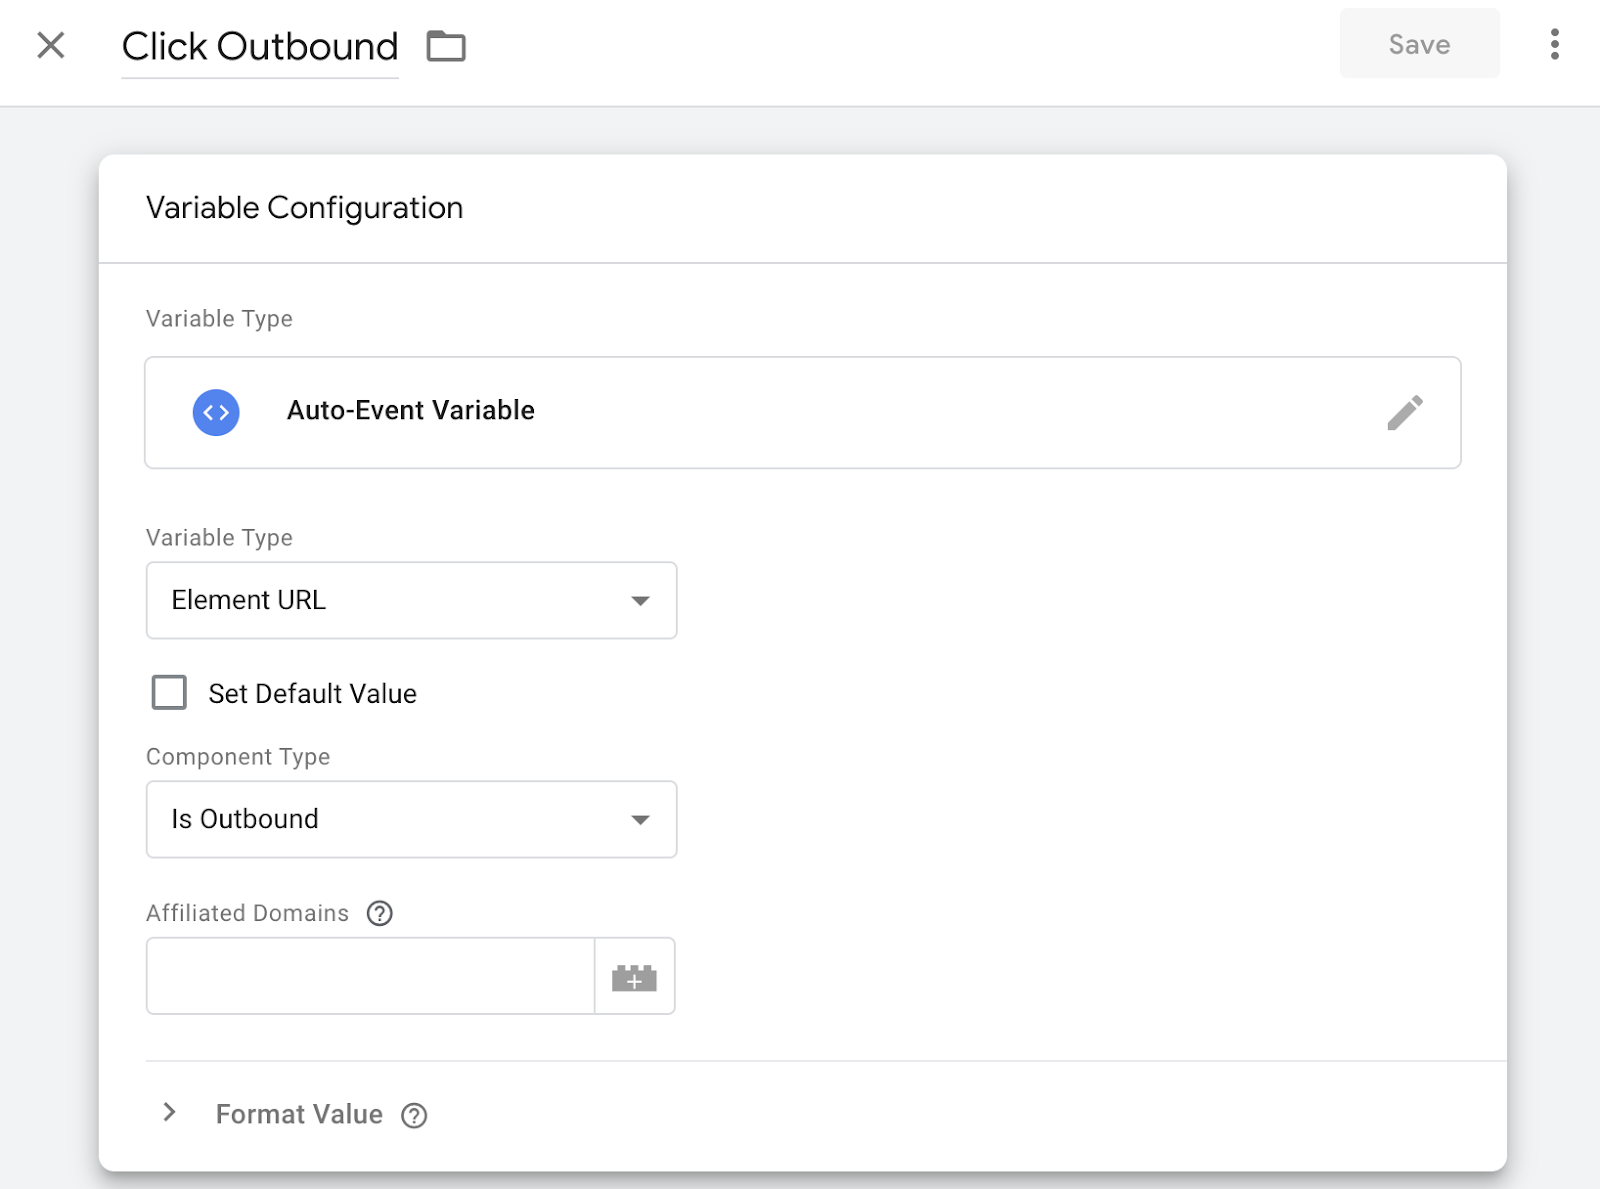
Open the menu and select “Element URL.” Selecting this option will create a new field called “Component Type.” Open the menu and select “Is Outbound.” Your variable should look like this.
Now we are going to head bag to our Click tag and finish setting it up.
Click Variables – Implemented
Under Tag Configuration, select “Event Parameters.” This is where we will make use of the variables we just created. Add five rows so we can input the five variables. For the five parameter names, you will want to use outbound, link_url, link_classes, link_domain, and link_id. Under “Value,” click on the icon that looks like a lego brick with a plus sign on it.
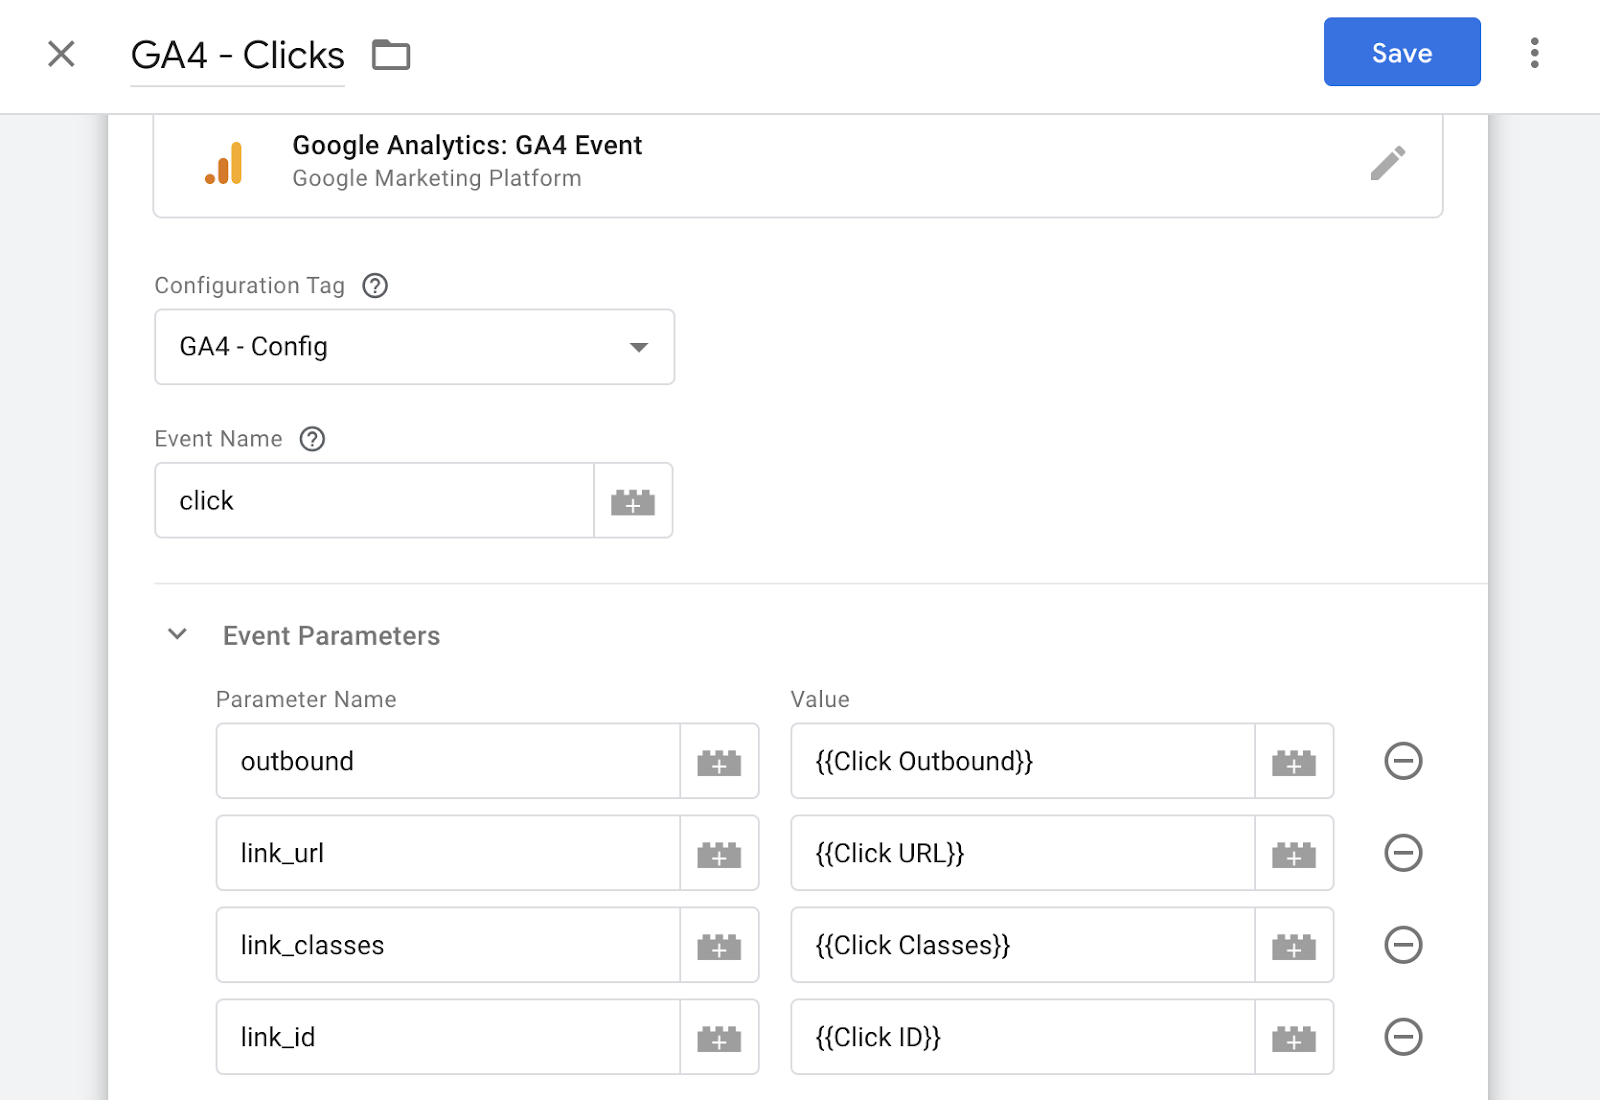
Your tag set-up should look like the above.
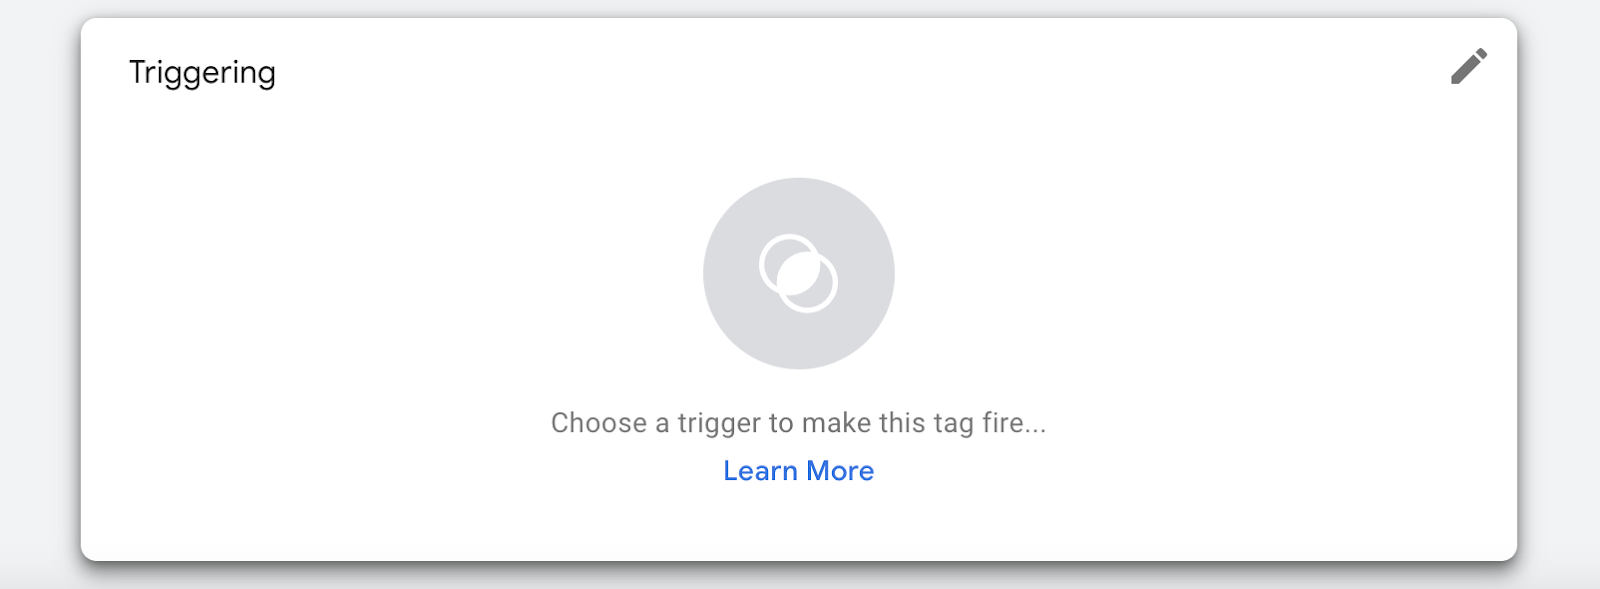
Next, we need to create the trigger for our Clicks Tag. Click the section on the bottom titled “Triggering.”
Next, we will need to “Choose a Trigger.” Click on the plus in the upper right-hand corner. Name your trigger “All Link Clicks.”
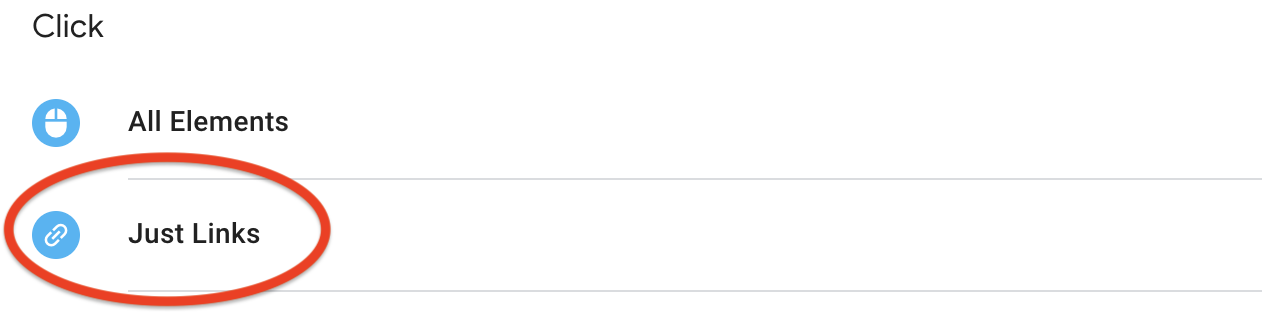
Next, click on “Trigger Configuration” and select “Just Links” under the Click section.
Stick with the default setting for this trigger. You do not need to alter the specifics.
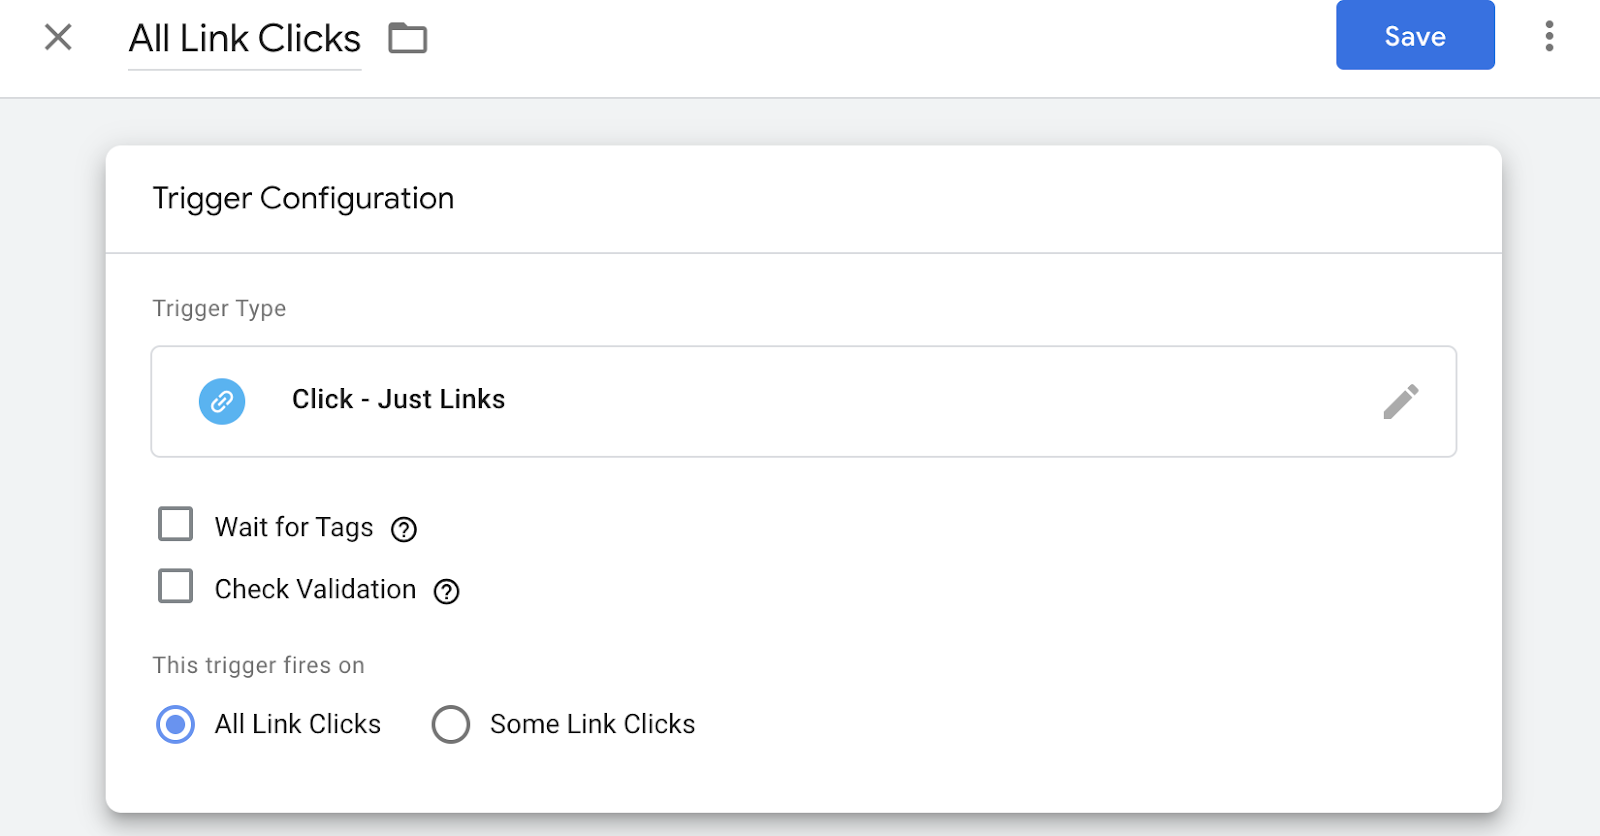
Save your trigger and then your tag.
Congratulations! You have set up your Clicks Tag! 🎊🎊🎉🎉
Now that this tag is set up, it will track all the link clicks on your website, will store the URL, class, and ID of that link, and it will differentiate between on-site and outbound links!
Tag Manager is a complicated platform, and even the best of us make mistakes every now and then. It is good practice to preview and test your tags before submitting them. This allows you to make sure your tags are running correctly without skewing any data.
Previewing “Clicks” Tag
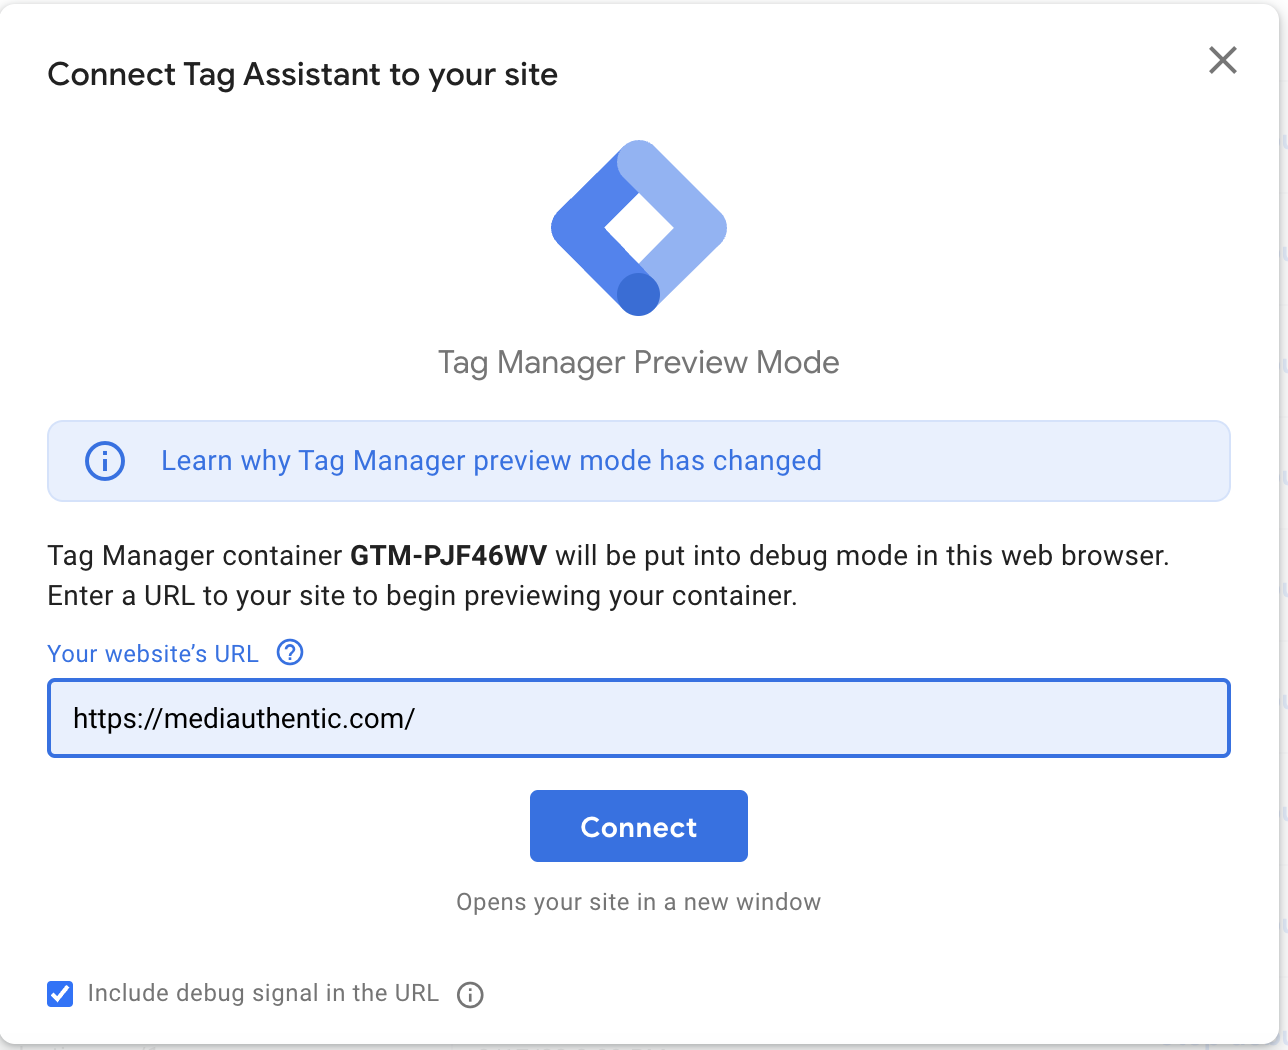
In the upper right corner of your screen, there is a “Preview” Button. Click it!

Enter the URL of your website and click Connect.
Navigate through your site and click on a button or link. Then head back to Tag Assistant, look for “Link Click” in the sidebar, and select it.
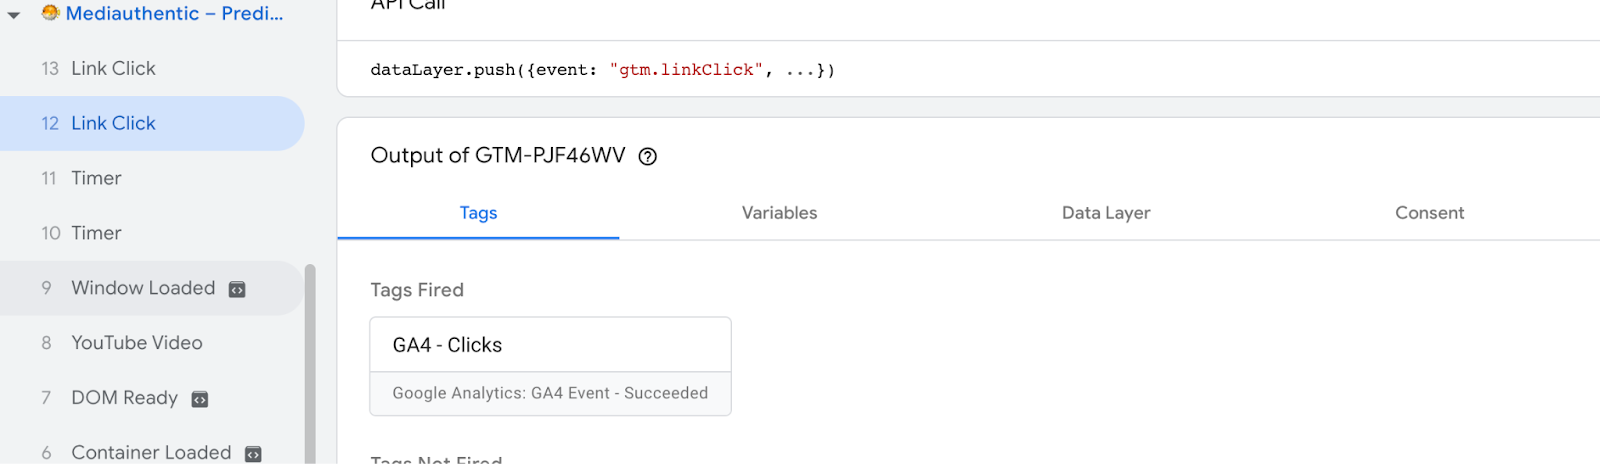
Your GA4 – Clicks tag should have fired with this event.
To check the parameters we added. Click on the tag to open it up.
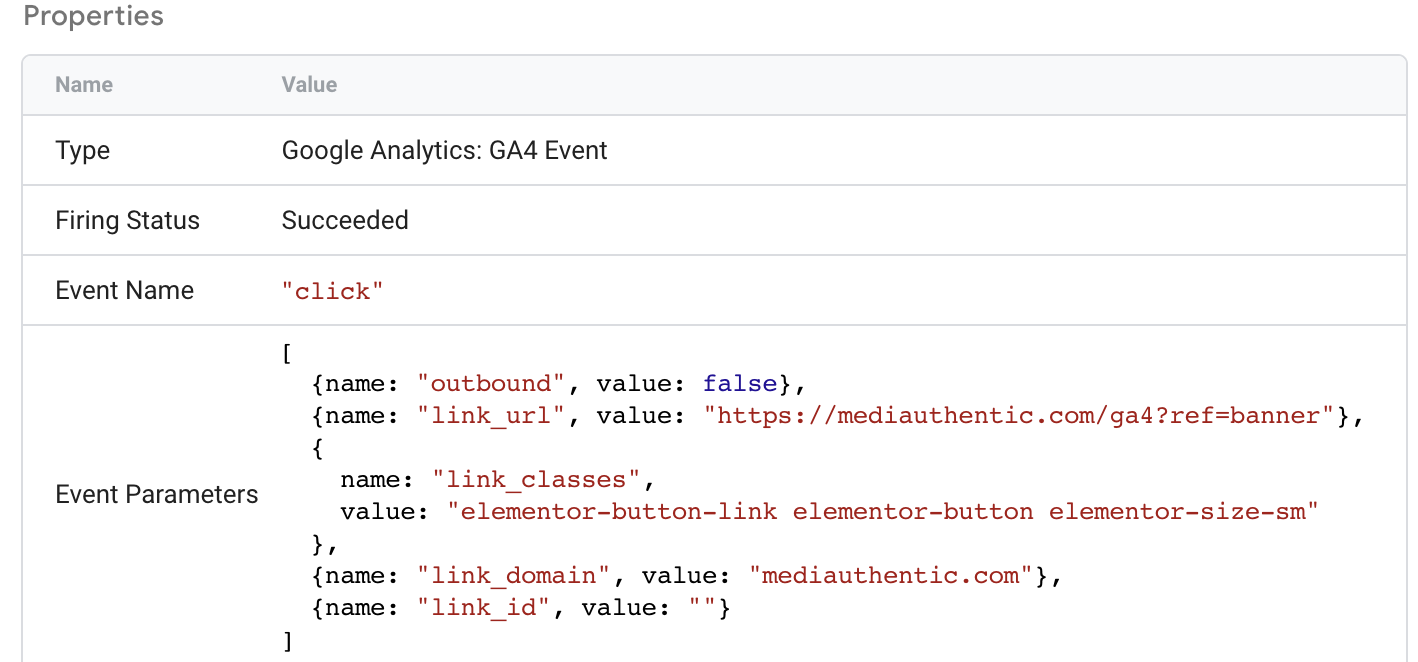
As you can see, we are now tracking if the link was on-site or outbound (this link was not outbound) and the rest of the values that we set. Some of these values may be blank, such as link_id above. That does not necessarily mean something is wrong; it may just be that there is no value set for that dimension on your site.
In order for us to visualize the information we have just collected, we need to give GA4 the tools to understand our custom parameters. Let’s jump right into that!
Google Analytics 4 Set Up
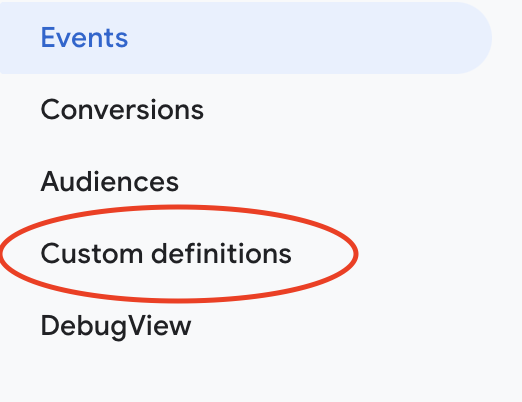
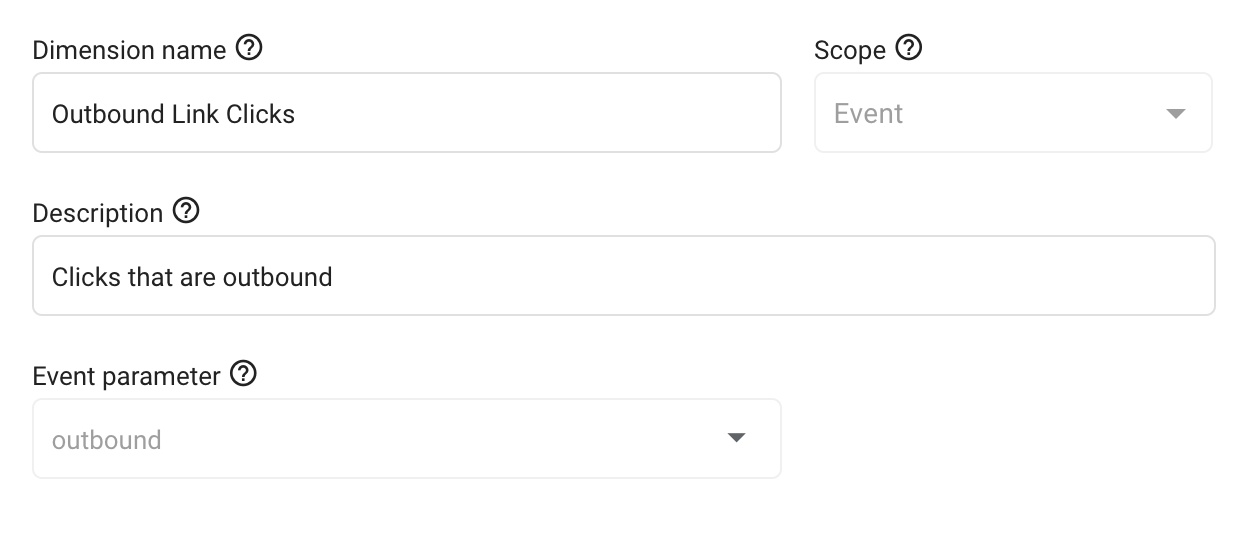
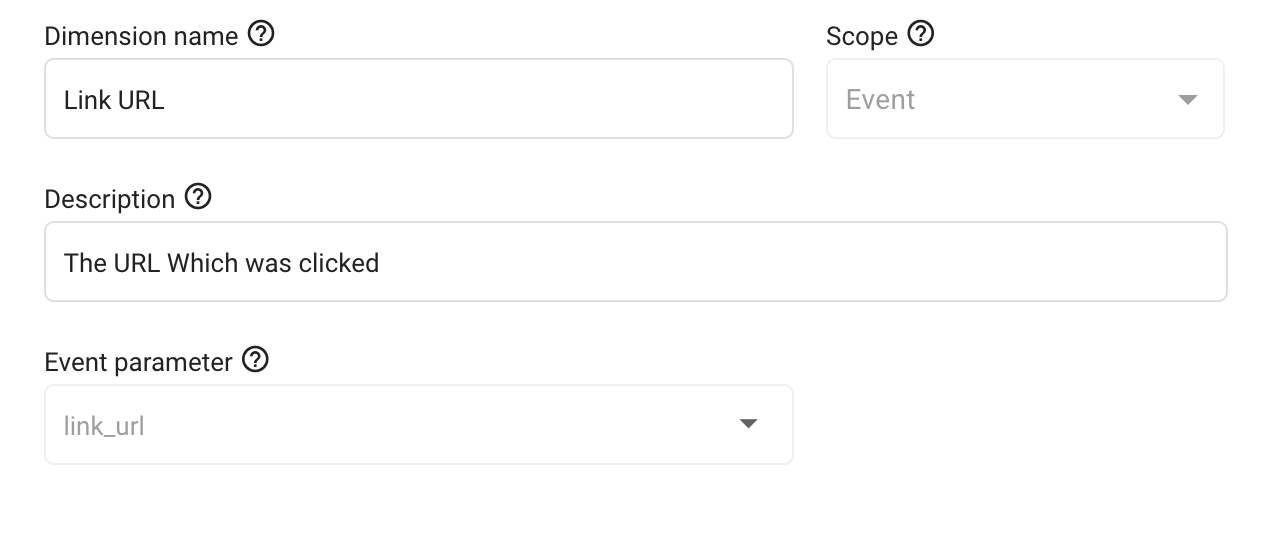
In your Google Analytics 4 Account, head to the section titled “Configure” and select Custom Definitions.
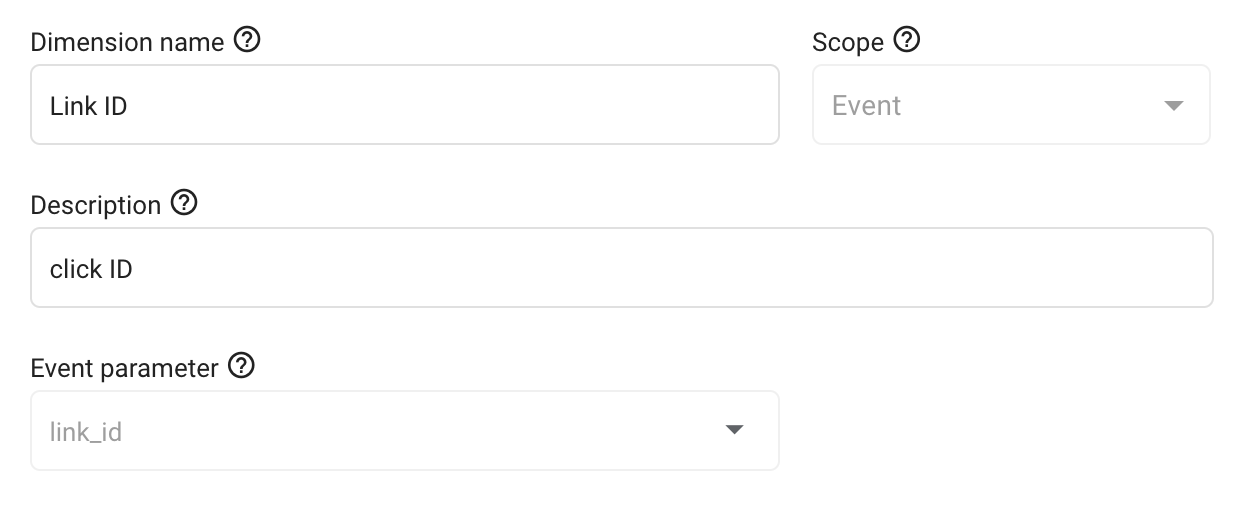
These are your 4 custom dimensions
In the top right corner, click “Create Custom Dimensions.” You will need to create four custom dimensions – one for each parameter we set. Below are images showing you exactly how to set up each dimension. Take a look! 😀

And just like that, we are done in GA4. Let’s head over to Looker Studio to visualize some of this information!
NOTE: GA4 takes around 24 hours to start showing newly added data. So, you will need to wait about a day to visualize your affiliate link clicks. If they aren’t showing up before 24 hours have passed, don’t worry, that doesn’t necessarily mean anything is broken.
Looker Studio Reporting
We can create clear paths to action through data visualization and efficiently and effectively improve our marketing strategies. Looker Studio is an incredible tool to do just that.
For the purpose of improving affiliate marketing, we need to create a table that will show us which links on our sites are getting the most and least traffic.
To begin, open Looker Studio and create a blank report.
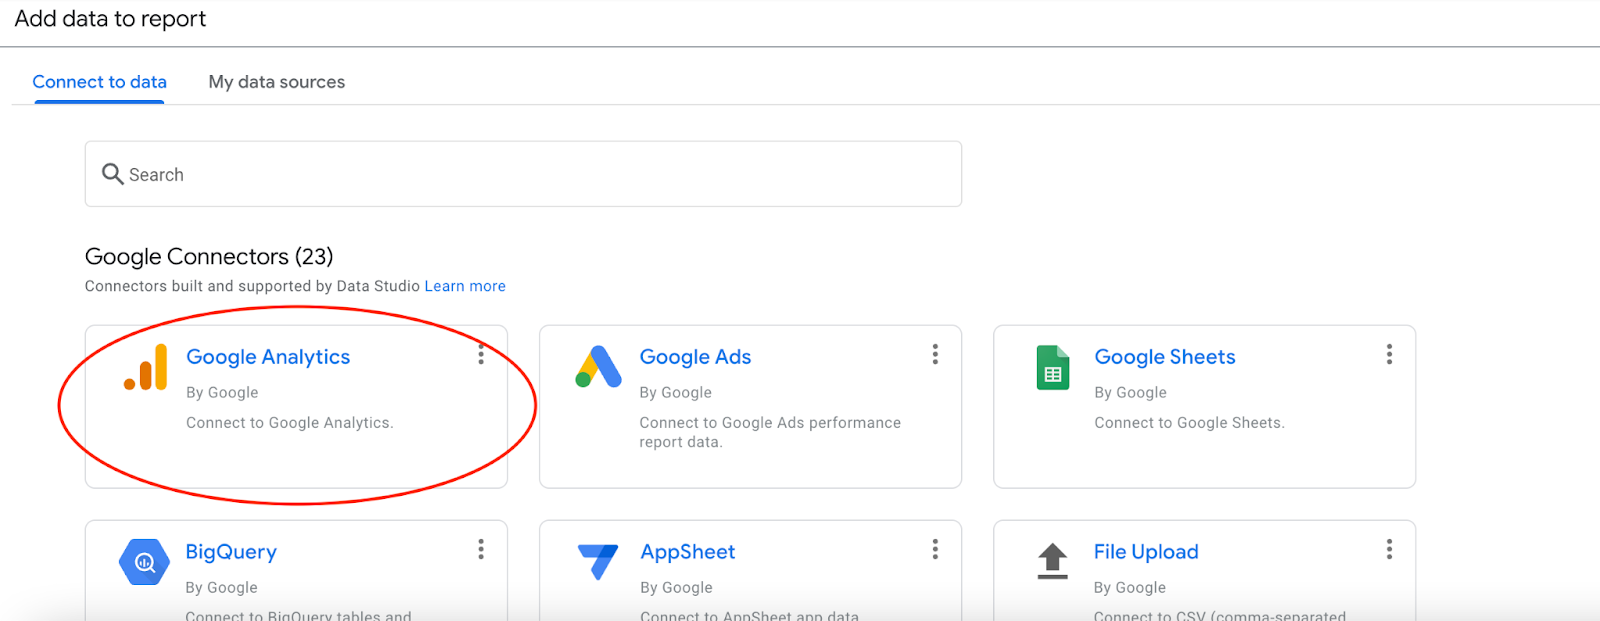
Once the report has been created, we need to connect our data source. At the top of the page, in the toolbar, select add data.

A menu with several connector options will pop up, but for now, we only need to connect to Google Analytics. This should be the first option in the menu. Click it and select your container.
Once we have connected our data source, we can begin visualizing our data! 🎊🎉🎊🎉 The visualization for this particular data set is best formatted in a table. In the toolbar, click add a chart and select the table tool.

The dimensions we will need to begin are Event Name, Outbound Link Clicks, and Link URL. We will only need to use one metric: Event Count. You can add these to the chart either by dragging them from the menu on the right-hand side of the page directly onto your table or by placing them in their respective categories under “Setup.”
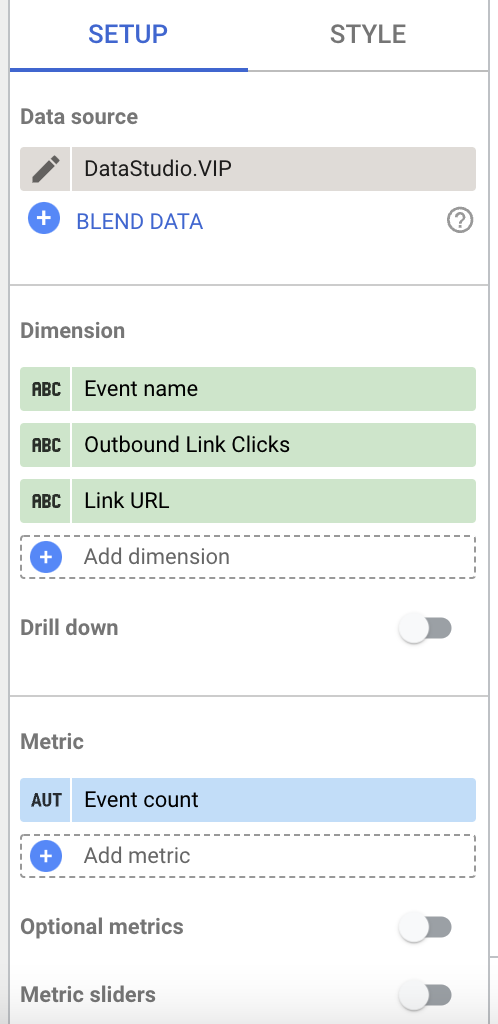
With these dimensions and metrics and this configuration, the table will display all GA4 events and list both on-site, and outbound link clicks.
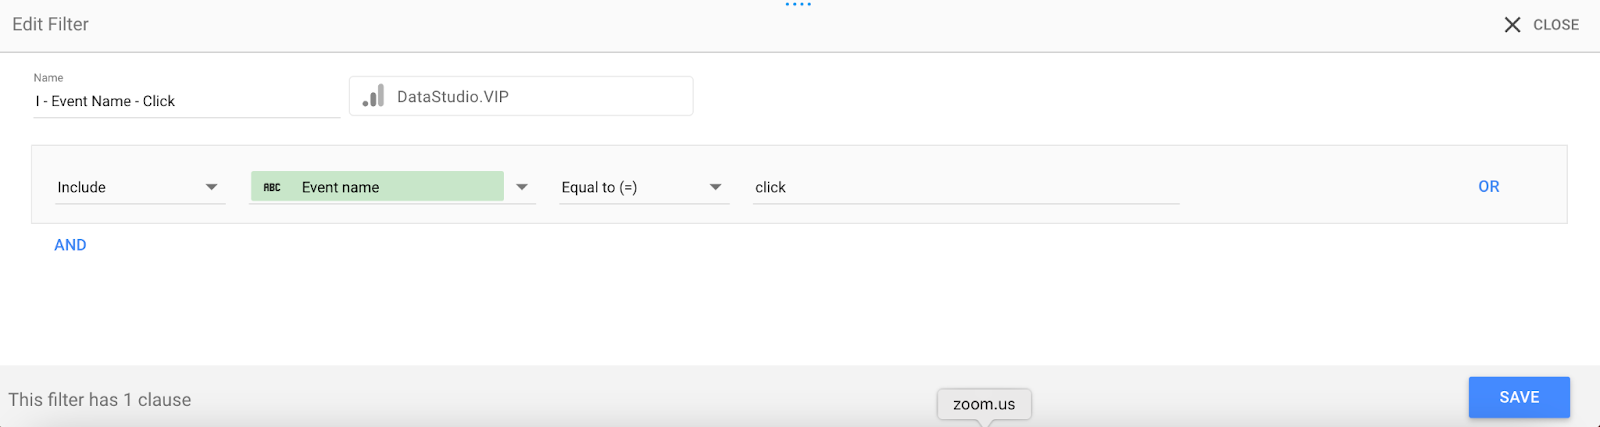
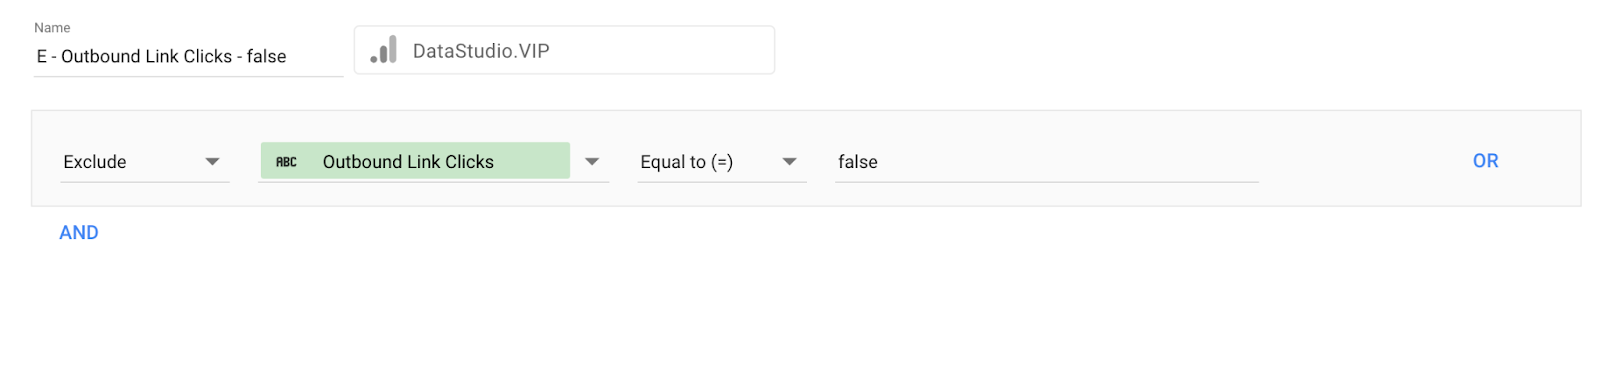
We only want to see outbound click events, so we need to add filters to our table to eliminate the excess data.
Scroll down to the bottom of the set-up menu and select “Add a Filter.” We will add an Event Name filter and an Outbound Link Clicks filter. See below for the exact setup.
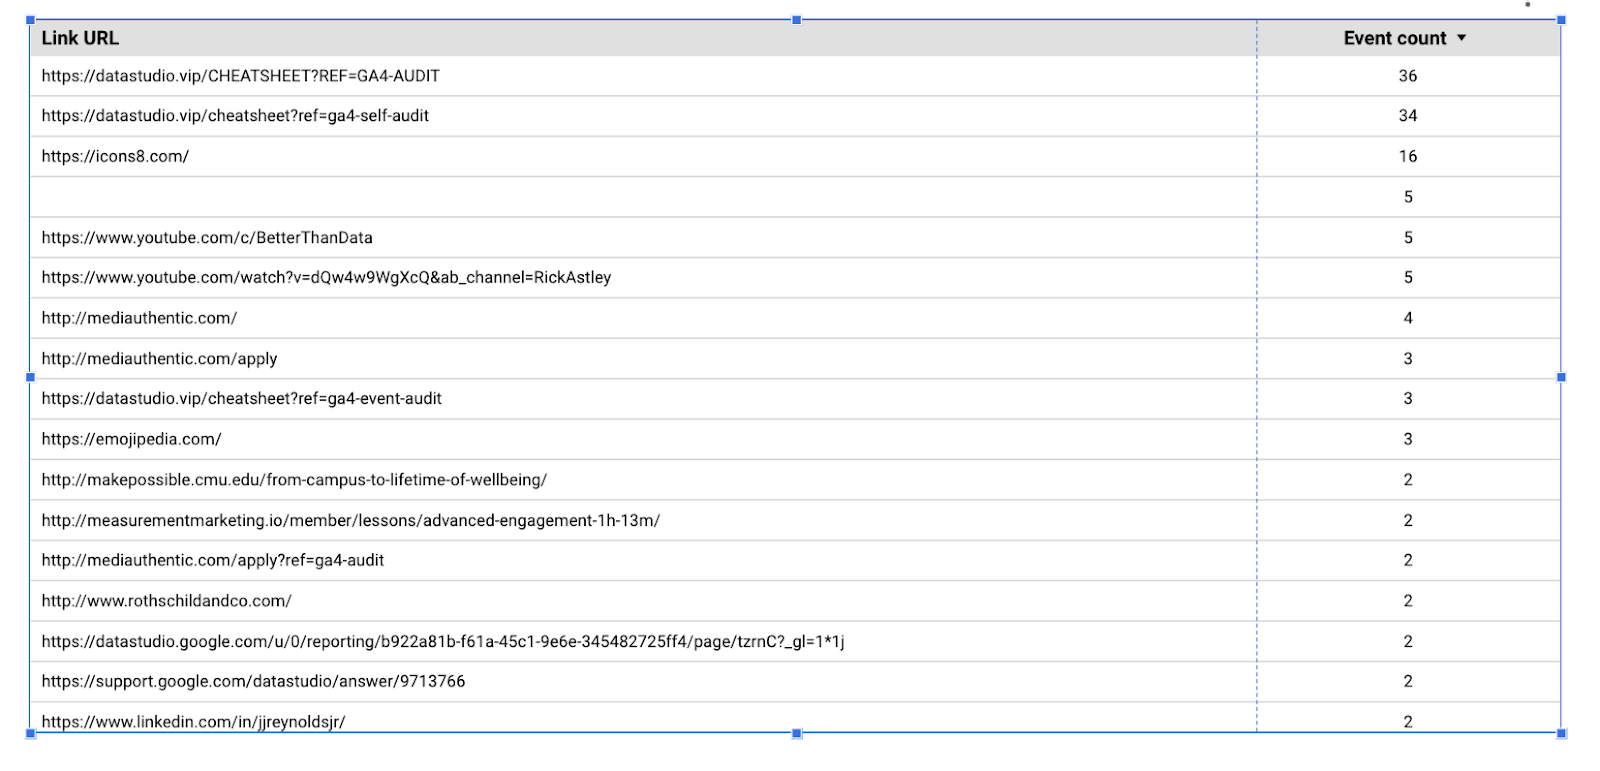
Once you have added these filters, you will no longer need the dimensions for Event Name or Outbound Link Clicks. This will leave you with a chart similar to the one below. This chart shows how many times each outbound link on your website has been clicked.
If you are seeking to track one specific affiliate link, you will need to add a filter that includes its specific Link URL. I suggest you remove the “https://” and select contains rather than is equal to.
And Ta-da! You have displayed Affiliate Link clicks for all pages of your website using GTM, GA4, and GDS. That’s quite the feat! You’re too good at this! 😉

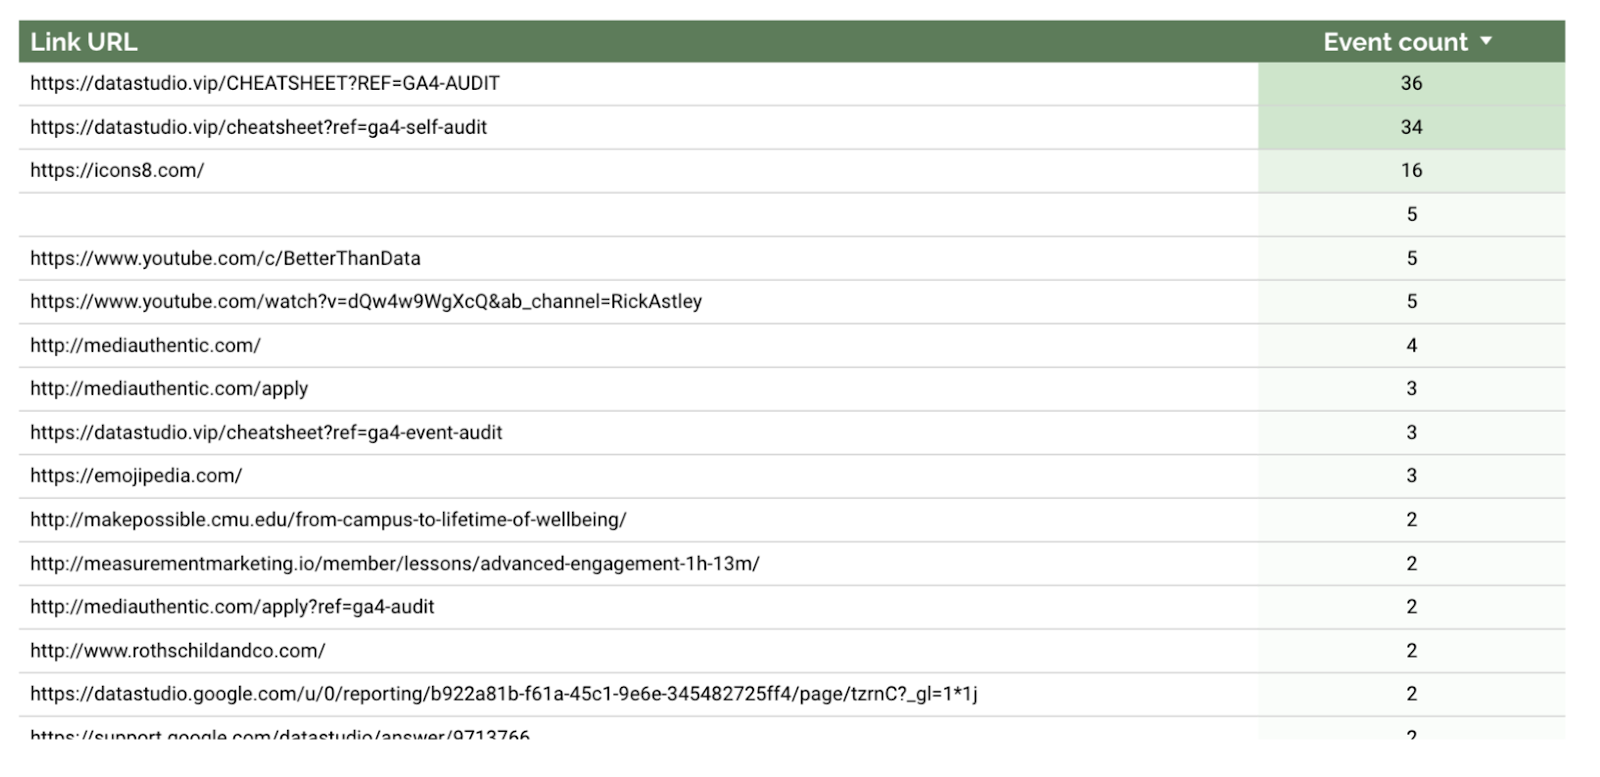
You are more than welcome to stop here, but why not add some pizzazz by utilizing that style tab? Though remember, sometimes less is more. I like the color green so, behold, a green table. 😂
You have creative control! Go on, have some fun. You deserve it!